Solar Mounting System For Green House The Installation of Mounting Unit Solar Panel Mounting Frames,Solar Panel Mounting Systems,Greenhouse Solar Mounting System,PV Mounting Systems Hebei Honde Plastic & Metal Co., Ltd. , https://www.foundation-system.com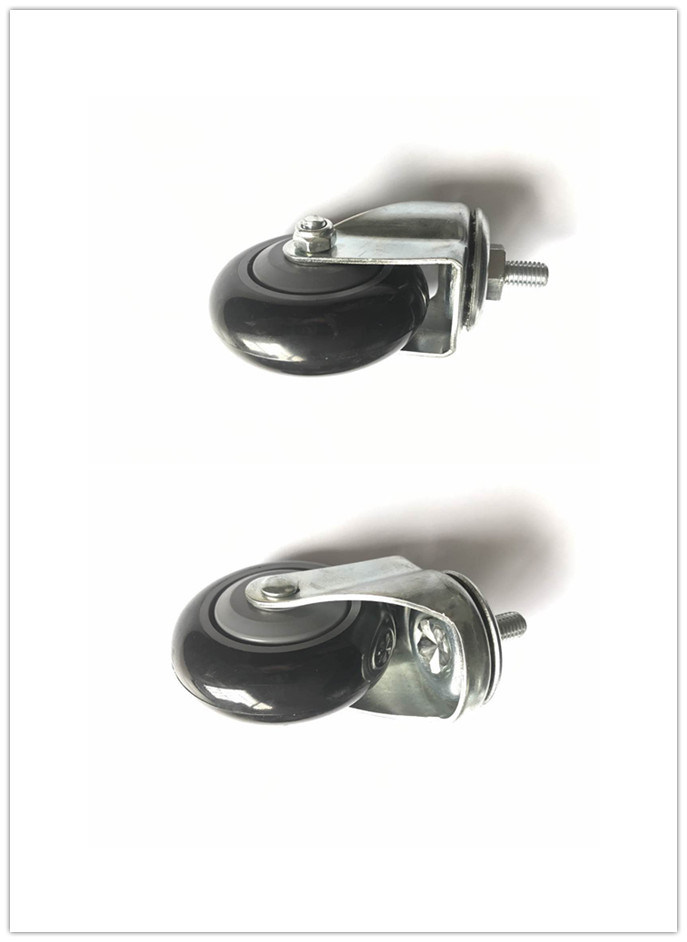
Model No.
OLT-03-02
Screw diameter
10mm/12mm
Wheel material
pp+pu
Color
grey/black
Wheel diameter
75
Housing thickness
2.0
Wheel width
30
Brake
No
Overall height
98
Housing material
Zinc plated steel housing
Load capacity
35kg
Application
trolley
Shopping cart caster Â
 screw fixed castor, housing made of pressed steel, bright zinc plated, bead plate frame
Wheel centre made of PP
Tread: high quality Pu
Bearing:6201zz
Application:
 shopping trolley& carts,supermaket
Advantages:
Agility, easy moving and durability
We produce many other kinds of products and can also make products according to clients' specifications and samples.please feel free to contact us, there are various colors, styles, and samples for your selection. We will be at your service any time
OEM orders are welcome.
Your enquiry will receive our most attention!
Why choose us :
Oulitai caster is engaged in developing and manufacturing different kinds of casters. After years of efforts, our factory has been developed one of the leading caster manufacturer. we have supplied for carrefour supermarket/Kailiou Commercial Equipment Co.,Ltd/Suzhou QHDC metal product co.,ltd and other shopping trolley marker.
1. Make the concrete base according to solution drawing, locate embedded bolts and set out strings by Laser Level to ensure the centers of embedded bolts in the same elevation as accurate as possible on vertical, horizontal direction and at end face.
2. Locate the Anchor Plate on the concrete base and adjust the position according to solution drawing(remove M14 washer,M14 spring washer,and M14 nut if they are connected to embedded bolts now),and then fasten M14 washer, M14 spring washer, and M14 nut with the tightening torque of 60N.m.
3.Take out the Hexagon Bolt Kit with Post B Corrugated Gasket M12x95 and remove its nut, spring washer, one washer, and corrugated gasket. Insert the Post A, B, C in to Anchor Plate according to the Hexagon Bolt Kit with Corrugated Gasket M12x95 drawing and then fix them by two sets of Hexagon Bolt Kit with Corrugated Gasket M12*95. Post C Post A
4.Remove the bolt kits M12*90 from all the Posts and Pre-Assembled Supports and unfold the embedded Supports, fasten them on the Posts by bolt kits M12*90 according to the drawing.
Installation of Rails
1.Please check the length of Beam before place it onto the Pre-Assembled Supports, otherwise extend it with Splice forBeam first. There are 4 self-tapping screws in each side and total 8 self- tapping screws in both sides. We strongly recommend NOT extend the Beams on Preassembled Supports.
2.Before locate the Beams, mark the position of the Beam son the surface of Pre-Assembled Supports with maker pens according to solution drawing for easier installation. Place the Beams on the 55*80 Tube of Pre-Assembled Supports and fix it with C Clamp Kits. Install all the Beams in the same step. The tightening torque will be 20N.m. C Clamp Kit Side Beam(Please arrange 3-4 persons to install when the array is long.)
Installation of Solar Panels
1.Place the panels above the Beam 85, fixing it with Wide End Clamp Kit in the side and Inter Clamp Kit in the middle. Install all the panels in the same steps until complete installation of al panels. Fasten all the bolts with tightening torque of 10N.m.
2.Complete installation, and please inspect and make sure all the bolts are fastened.
Model NO.: OLT-03-02
Trademark: oulitai
Specification: 75mm*30mm
Origin: Jiangsu, China
HS Code: 87169000
Parameter